Eye of Azshara Mythic+ Guide
Instance Breakdown
Recommended Comp for high keys: It’s useful to have a few interrupts for the Hatecoil Arcanists but it’s not essential. AoE DPS is particularly strong in Eye of Azshara, as are executes (for the final boss).
Instance Timer: 35:00
Average # Mobs per pack: 3.5
Trash
[masterslider id=”4″]Trash ERT Note
Copy and paste this into the Exorsus Raid Tools Notes section. You can share it with your group.
|cffffff00Eye of Azshara Trash Path|r
Pull Stormweaver / Warrior pack x2
Pull Turtle
Pull Crusher
Pull Stormweaver / oracle pack
Pull three pack in front of Parjesh
{skull}|cff8788eeWarlord Parjesh|r{skull}
Mount up and run back up the path to the left
Pull the patrolling Arcanist
Pull the droplet pack nearby
Mount up and dash across water toward Hatecoil
Pull Droplet pack on the beach x2
Pull nearby Arcanist
{skull}|cff8788eeLady Hatecoil|r{skull}
Pull droplet / crab packs
Pull patrolling Hydra
Pull patrolling pack of small crabs
Pull sand crab
Pull Hydra
Pull small crab pack toward cave entrance
{skull}|cff8788eeSerpentrix|r{skull}
Pull sand crab near cave
Pull small pack of crabs near cave
Wait for and pull Murloc patrol
Take the left cave passage
Pull Bitterbrine Slave pack x2
Mount up out of cave and run toward Deepbeard.
Pull murloc pack to the left of the twin Giants.
Pull twin giants.
{skull}|cff8788eeKing Deepbeard|r{skull}
Pull the four Sea Witches. Remember to interrupt.
{skull}|cff8788eeWrath of Azshara|r{skull}
|cffffff00Questionablyepic.com/mythic-plus|r
Bosses
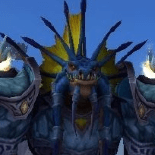
Warlord Parjesh
Absolute Murder… in fish form

Dungeon Journal+
Impaling Spear Single Target Physical Debuff ✔Dodgeable
Throw Spear Single Target Physical Debuff
Crashing Wave AoE Frost ✔Avoidance ✔Dodgeable
Call Reinforcements Summon
Bellowing Roar (Hatecoil Shellbreaker) AoE Physical ✔Avoidance ✔Interruptable
Lightning Strike (Hatecoil Crestrider) Single Target Nature
Restoration (Hatecoil Crestrider) AoE Heal ✔Interruptable
You should know
- You need to stand behind an enemy hatecoil minion when Impaling Spear is being cast so that they get hit instead of you. Beware that on high keys the spear alone might not be enough to kill the add and you might need to add a little damage of your own to make sure it doesn’t rejoin the fight. DoTs are usually plenty if you have any.
- Quicksand covers any location that Parjesh charges through during Crashing Wave. The tank should position the charge so that it takes up as little room as possible and melee should give the boss some space since it can hit you even if you are standing behind him. This both minimizes the chance of somebody getting hit by the wave and maximises the amount of space you have to work with. If you drop Quicksand everywhere your DPS will also have trouble kiting the Impaling Spear through one of the Hatecoil minions.
- You must interrupt every Restoration cast before it starts healing. Similarly the tank should be interrupting every Bellowing Roar cast since it can be lethal when combined with the ticking damage from Throw Spear. Lightning Strike is a much lower priority.
- It is usually best to cleave down the Shellbreakers (melee fish) and Impale the Crestriders (healing caster fish).
Lady Hatecoil
The punishment for kicking your friend into the water during Static Nova is a lifetime of Lower Kara keys
Dungeon Journal+
Static Nova AoE Nature ✔Avoidance ✔Dodgeable
Focused Lightning AoE Nature ✔Avoidance
Curse of the Witch Single Target ✔Dispellable
Beckon Storm Summon
You should know
- You need to spread out during the Focused Lightning cast since Excess Lightning is a heavy punish for stacking. For 22+ tyrannical keys put on a couple pieces of Avoidance gear to avoid it one shotting you. Tank trinkets with on-use damage reduction can also be very useful if you’re playing a squishier class (sorry, hunters).
- Focused Lightning also destroys any sand dunes you’re standing on.
- I’d recommend a weak aura for a countdown on the Curse of the Witch. It often expires during the Static Nova cast and can be dangerous if you’re facing the wrong way. The blast does kill any Saltsea Globules that have popped up and you should do this when it’s convenient but it’s not a huge priority.
- The boss will wreck you if you try to leave her little arena. Attempting this is not recommended.
- Try and stay away from the Globules when they die. The damage is not dangerous, but the slow can cost you some DPS time if you’re a melee who has to run to a sand dune early. Healers shouldn’t feel the need to dispel this.
Serpentrix
Aww, look at that face
Dungeon Journal+
Poison Spit AoE Nature ✔Avoidance ✔Dodgeable
Toxic Wound Ground Nature ✔Dodgeable
Submerge Summon
Blazing Nova (Blazing Hydra Spawn) AoE Fire ✔Avoidance ✔Interruptable
Arcane Blast (Arcane Hydra Spawn) Single Target Arcane ✔Interruptable
You should know
- Poison Spit and Toxic Wound are both 100% dodgeable with smart movement though when you’re just fighting Serpentrix you might choose to stand in the Poison Spit to maximise DPS time (consult your healer).
- Any damage the Hydra Spawns take is copied to Serpentrix so they’re always worth killing.
- During the submerge transitions I’d recommend sending two DPS to the Arcane hydra and one to the Blazing hydra. The Arcane hydra deals +50% damage for every successful cast and this gets uncomfortable quickly. The tank should head to Serpentrix and interrupt the Rampage. While rampaging the boss casts Poison Spit every 0.5 seconds and while it’s avoidable it’s expensive to dodge from a DPS perspective.
King Deepbeard
I actually wrote this guide during a King Deepbeard fight. It’s that damn long.
Dungeon Journal+
Gaseous Bubbles Single Target Debuff
Call the Seas AoE Frost ✔Dodgeable
Ground Slam AoE Physical ✔Avoidance ✔Dodgeable
Frenzy LowHP Enrage
You should know
- Quake deals additional damage to anyone within 5 yards of you. Make sure you are at least that far apart. Four seconds after the quake all pre-existing quakes will erupt again dealing significant damage (this is called Aftershock in the combatlog).
- Gaseous Bubbles is a buff placed on you that will absorb a significant amount of damage over up to 20 seconds. If you don’t deplete the shield within 20 seconds it’ll deal damage to your entire party equal to how much shield was left. So if you’re a bit slack and still have a 1 million absorb left then you’ve caused 5 million across your party. The best way to remove the bubble is to follow around the blue ground effects caused by Call the Seas. Quake will also give you a helping hand but I’d recommend you don’t try to remove it with Ground Slam or Aftershock since they’ll likely kill you on a high key.
- This is a very long fight with a lot of easy to avoid but lethal mechanics. Stay spread out, remove your shields, stay out of aftershock, avoid pulling any seagulls and he shouldn’t cause you too many issues.
Advanced
- You can pull the snail near Deepbeard during the fight on non-bolstering weeks for extra damage and a little extra trash percentage. Affliction Warlocks in particular are big benefactors since you get extra shards from your Agony on the poor gastropod.
- You can run Sephuz’s Secret and pop your CC on either the snail or the tiny crab critters found throughout his room for a high uptime.
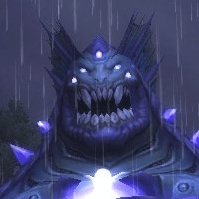
Wrath of Azshara
If you look closely, the boss has a night elf inside
Dungeon Journal+
Heaving Sands Single Target Physical ✔Avoidance
Mystic Tornado Ground Arcane ✔Dodgeable
Massive Deluge Ground Frost ✔Dodgeable
Crushing Depths AoE Physical ✔Avoidance?
Arcane Bomb AoE Arcane Debuff ✔Dispellable
Lightning Strike (Phase 2 only) AoE Nature ✔Dodgeable
Tidal Wave (Phase 2 only) Ground Frost ✔Dodgeable
You should know
- Using heroism in phase 1 is better for the timer since there is less movement, but phase 2 (sub 10%) is more dangerous so popping it then gives you a better chance of killing the boss. Decide based on how much time you have left.
- In late phase 2 you might want to consider sacrificing the Crushing Depths target to preserve overall party health. It can also be removed with Blessing of Protection if you’re running with a paladin and if you have a full immunity you should use it.
- You don’t need to spread out very far. Your healer has a 40 yard range but most AoE heals start to lose effectiveness past 30 yards. Stick together.
- Every spell you get hit by will give you a stack of Magic Resonance or Frost Resonance increasing the damage you take from that school for the rest of the fight.
Advanced
- Despite what Crushing Depths says on the tooltip it actually deals damage to each player based on their own maximum HP (not the maximum HP of the Crushing Depths target). This doesn’t change the strategy (stack people in, or sacrifice them) but does eliminate Weapon swap macros and the like.