Mage Tower Challenge – Monk
9.1.5 sees the return of Legions infamous mage tower challenge. If you can knock it over you’ll get a transmog set, and if you can complete all of them there’s a mount up for grabs. This is a very difficult challenge and Mistweaver is a tricky but rewarding spec to complete it on. You’ll be joined in your adventure by three AI players. They aren’t exactly good players but they’ll have to do. To get into the Mage Tower you’ll head to Deliverance Point on the Broken Shore.
Video
How do I enter?
Head to the Broken Shore. There are no other requirements but a Dalaran Hearthstone will get you there faster. There’s no mail box nearby so you’ll need to bring you consumables with you.
Stuff you should bring
- Drums (These are of very high value since your party also gets the buff).
- Flasks (you’ll want to bring enough for a few hours at least)
- Your choice of food buff.
- If you have one, a good DPS trinket can help quite a bit – particularly in the last phase.
Covenant, Legendaries & Loadout
Legendaries, covenant abilities and other special effects don’t work. I’d recommend you have a few haste pieces on but otherwise your stats don’t matter much. The challenge is all about playing well.
Recommended Talents

- Chi-ji has some particularly nice moments through the fight but isn’t essential if you’d rather play Jade Serpent Statue.
- Chi Burst doesn’t do much, but the row in general is low value.

The challenge starts with a war against the undead. This is one of the two most difficult phases and you can expect it to take quite a few attempts to master. Once you have it’s extremely repeatable.

Risen Arbalest (Archer)
Special Ability: Mana Sting. Will fire an arrow that follows a big blue line. You need to stand behind a party member so that they intercept the line. It doesn’t do that much damage so any of the three will do. If it hits you it’ll quickly drain all of your mana. If you do get hit, try and dispel immediately. You have about a second to get the dispel before it nukes your mana.
The Arbalest will also shoot arrows randomly at the party for low to medium damage.
Risen Mage
Special Ability: Will spam Arcane Blitz. Every cast will give the mage a stacking damage buff but if you interrupt it the buff will fall off. We’ll use Paralysis, Ring of Peace and Leg Sweep to interrupt it.
Risen Soldier
Special Ability 1: Knife Dance. This is identical to the Knife Dance from Blackrook Hold except it cannot be outranged. You can either heal through it or interrupt it. You’ll want to interrupt it most of the time. It consists of a cast followed by a channel. You’ll need to interrupt it during the channel or he’ll recast it.
Special Ability 2: Fixate. The soldier gains a significant DPS buff and will fixate you or a party member. You can either kite with Chi Torpedo or pop Soothing Mist and just heal through it. Kiting is safer in most cases.
Toughest Waves
Wave 3 – Mage, Warrior
This isn’t too tough a wave but deserves special mention. Interrupt the first Knife Dance with Ring of Peace, NOT Leg Sweep. This means that you’ll have Leg Sweep up for the following wave 4. By using Leg Sweep instead of Ring on wave 4 you won’t desync the two Warriors and the wave will be much easier.
Wave 4 – Pop Drums here: Mage, Warrior, Warrior
Begin the round by standing on where the Mage will spawn toward the gate. I usually pop Chi-ji here straight away, and you’ll want Leg Sweep ready for the first Knife Dance set. If you use Ring of Peace instead then the two warriors will desync and be much more annoying to deal with. After the stun ends, both will fixate you. Be ready to roll away and you can even start running early. You will use Ring of Peace on the second Knife Dance cast set. You can use Paralysis when there’s only one Warrior left.
Wave 5: Mage, Warrior, Archer
This is a very tough, bursty pull but somewhat easier than the last. Stack the mage and warrior on top of each other and you’re going to use Leg Sweep to interrupt the first Knife Dance. Remember to keep dodging the Mana Sting since the wave is much less fun with no mana. Drums will get you through this pull very quickly so you don’t have to hang in there for long. Don’t save anything here – Revival, Chi-ji, Life Cocoon – use them all.
Stuff that can go wrong
- The double warrior pack can cast Knife Dance at separate times sometimes: This happens when you Ring of Peace a double Knife Dance. You want to try and Leg Sweep instead and save Ring for the second double Knife Dance of the set.

This is a chance to get your mana and cooldowns back. You can AFK here for as long as you like and Stage 3 won’t start until you enter the building.

You get 5 minutes to finish Stage 3 which ends with a mini-boss at the top of a staircase. There’s a lot to get done here so you’ll need to move at a brisk pace. There’ll be a few sparkly green orbs flying around (not the eyes). You can one shot these with Spinning Crane Kick.
Flickering Eyes
- First up, flickering eyes. You’ll want to clear these carefully since they’ll deal about 65% of your health in damage when they die. They deal heavy damage while you’re underneath them and so you’ll want to walk in for a few hits and then back out again to heal up.
- Only ever go for the killing blow when you’re either full health or have Diffuse Magic running.
- Kill the first one with Touch of Death to give yourself a bit of room to move.
- Rising Sun Kick will kill an orb from ~35%ish health, a full 3 stack Black Out Kick will do it from a bit higher. You mostly just want to play safe until you get used to the pattern of play.
- 3:45 on the timer is a good goal for this first room.

The Cronies & the Stairs
- Next, you’ll have to kill a Felguard and his three Bat friends. If you pop Chi-ji here then not only will it keep you topped off, it’ll also heal the ghosts in the next room. This is a decent time saver and I’d strongly recommend it. The pack otherwise isn’t very difficult.
- Up the staircase you’ll see four dying ally ghosts and an enemy Archer. Dispel the feared one and then heal the other three ghosts. If you did the Chi-ji trick above then they’ll already be 80%+ health. If not, a couple of Vivify casts on each is more than enough to finish the job. You can also Revival here to save even more time.

- Once you’ve healed all three ghost allies to full, you should engage the Archer. Use your maximum melee DPS rotation and you should have it dead within 30-40 seconds. When it casts Mana Sting you should either hit it with Paralysis or use one of the ghosts you healed to line of sight the cast. Save Ring of Peace for the next room.
- Next, a big collection of Fel Orbs. Spinning Crane Kick will get you through quickly. You’ll want to aim to have 90 seconds remaining as you’re opening the gate.
Save Grannie: The Mini-boss
- At long last the mini-boss (and three more eyes which are honestly tougher than the mini boss). This is the last pack you have to clear before the timer ticks down but all of them must die. Pop a DPS potion here to save yourself 5-10 seconds.
- Use Diffuse Magic and quickly burn down one of the three orbs to give yourself space. You should still watch your health, even with Diffuse running.
- Next, kill the mini-boss. Remember that Touch of Death will kill him from 25% so you just need to get him the rest of the way.
- Use Ring of Peace on the remaining two eyes if you need to buy yourself space.
- You don’t need to dodge all of the spinning beams that spawn. Just throw yourself a heal every now and again.
Having trouble with the timer? If you pause after phase 1 you can get drums back off cooldown for this phase. You’ll use them against the mini-boss.

This is another freebie and you should use it to get mana back. If you used drums for the mini-boss then you’ll want to pause for a few minutes here so that they’re back up for the last phase.

There’s a lot going on in this phase but it isn’t too difficult once you slow it down and take it step by step. Your allies are going to turn on each other, and will take reasonably high damage. You’re going to keep them alive while healing spirits that’ll float across the room toward the boss. You need to heal 8 spirits to full to end the phase and they come in waves of three. If any spirits reach the boss we’ll have to kill them in the next stage.
- Grannie and Callie tend to get hit pretty hard in this phase. Drop Renewing Mists and Essence Fonts between waves where possible. Mana isn’t too tight so you can also heal them with Vivify.
- You don’t take damage yourself in this phase so don’t bother pre-casting anything on yourself.
Here’s our strategy over three waves:
- First wave: Essence Font as the ghosts are starting to enter the arena. Once they’re all targetable hit Revival. Hit any that are still hurt with Vivify. This is an easier wave and you should get all three spirits.
- Second wave: The objective this wave is to get two only. As the spirits enter the arena hit them with a Soothing Mist -> Enveloping Mist -> Vivify combo to heal them to full. Do this on two spirits and ignore the third (you’ll see why in a minute).
- Third wave: This time we’re going to hit all three spirits with Soothing Mist -> Enveloping Mist -> Vivify. The spirit on the right hand side enters the arena first so start with that one. This can be a little tight but you should be able to get all three. It’s not a big deal if you get two.
- Fourth wave (if you miss one in wave 3): Single target heal any that you still need. They’ll all despawn when you get your 8 so ignore the others.
The key here is to heal 3 on our Revival wave, 2 on the second wave and then two to three on wave 3. By leaving a spirit up we get 20 seconds to drink to full mana while the boss role plays. Had we gone 8 from 8 the boss would have engaged us right away and killing him with little mana is extremely difficult.

Any spirits that you missed will spawn as enemies and they’re similar to in Stage 1 except with a quarter of the health. Remember your CC but otherwise you shouldn’t have too much trouble unless you missed 3+ spirits.

Lord Edris Thorn
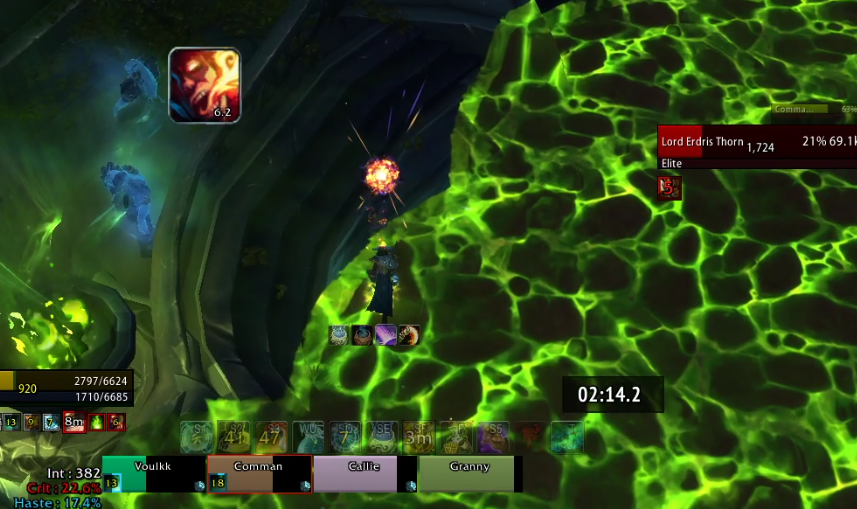
This was somehow the kill.
HP: 327,000 (this is 60% more than the Resto Druid Mage Tower for some reason)
Boss Ability 1: Ignite Soul. A debuff on you that lasts 8 seconds and then deals your current health as damage to the rest of the party. Your success here is heavily dependent on managing this debuff well. There’s a basic weak aura for it here: https://wago.io/issSyFiJy.
Boss Ability 2: Heroic Leap. Edris will jump to you and spawn a new Fel Pool. This always follows Ignite Soul’s expiration and there’s often a second one in between debuffs. Maximise the amount of space in the room by dropping these as close to existing pools as possible.
Strategy
- Jarod (the tank) will be taking most of the damage. You’ll want to keep him above 80% or so at all times. The rest of the party can mostly be healed with Essence Font and Renewing Mist.
- Open the fight by popping Chi-ji, popping drums and a DPS potion and getting in as much damage as possible. The first pool will spawn fairly quickly and you’ll be forced out of melee but stay in as long as you can. After this initial burst you’ll struggle to hit the boss much since he’ll be in pools the entire fight.
- Every time he jumps to you hit him with something. Rising Sun Kick is ideal, but Tiger Palm is fine if it’s on cooldown. This will extend a few HoTs and keep Mystic Touch active.
- You must control your own health bar. Aim to be 25-30% health when Ignite Soul expires.
- You can stack puddles on top of each other to make more room by popping Diffuse Magic and standing in an existing pool. Start in the middle of the room and then use the outside.
- The scenario only fails if one of your allies die. If you run out of room and are going to die, make sure you get Jarod to full health first. Your party can do about 10% of the bosses health without you and it’s likely your first kill will be while you’re dead (just don’t release).
- Remember to Touch of Death when the boss gets low. If you’re out of space then heal Jarod to full health and go down swinging.
- The boss is stunnable. If you time it right you can skip a pool, but this is a bit tough without proper timers so popping it on cooldown is still reasonably effective at slowing the fight down.
Been at it a long time and can’t quite crack it? Here’s some cheese that’ll help
- BFAs Cyclotronic Blast trinket makes both phase 1, and the DPS checks in phase 3 and 7 significantly easier. It’s still not a freebie, but you’ll save yourself quite a few hours.
- You can use low level gear with a lot of sockets to get a decent stat boost.
I have a question….my Max HP in Magetower was 6900 HP….when the debuff runs out iam at 20-25% life….but why get one NPC 1800 damage from these explosion….and the 2 other NPC´s sometimes 4500-5500 damage and die randomly. thx
I actually have no idea what’s going on here. Looks like a bug maybe? All three NPCs should take the same amount of damage, equal to your current health when it expires. Is there any chance you had Life Cocooned one of them? If not I think you might have run into a bug!