Boss Guides (Antorus II)
Antorus, the Burning Throne concludes the expansion with an eleven boss raid culminating in a fight against Argus itself. This is part 2 of 3 and contains the four bosses in the middle of the raid (though Eonar could be fought earlier).
The Antorus guide is split into three parts for ease of navigation. You’ll want to read or watch a standard guide before you read through here since basic knowledge of the fights is assumed and only the healing side of the encounter is discussed. When considering legendaries you should take into account the strength of your non-legendary pieces in those slots.
Navigation Menu
Antorus I: Garothi, Felhounds, Antoran High Command, Hasabel
Antorus II: Eonar, Imonar the Soulhunter, Kin’garoth, Varimathras
Antorus III: Coven, Aggramar, Argus
Eonar the Life-Binder
Eonar is… strange. There isn’t much to heal and your biggest challenge as a healing team will be sticking to your assigned groups so that each DPS has a healer somewhere in the vicinity. Nobody is going to die to burst here, just to slow ticking damage if they find themselves isolated.

Average Fight Length: 6-7 minutes (Heroic), 8-9 minutes (Mythic)
Debuffs to add to your healing frames: Rain of Fel, Pain (Dispellable, Mythic)
Recommended Legendaries: Aman’Thul’s Wisdom, Prydaz… DPS legendaries?
Recommended Talents: Cenarion Ward, Feral Affinity, Typhoon, Cultivation, Germination, Flourish
Boss Guides: Wowhead, Fatboss (video)Tips
- [Leytorrent Timing]: You’ll have time between waves to drink if necessary but burning through your mana pool can be a challenge here so you probably won’t find you need it.
- [Efflorescence Placement]: Efflorescence is rarely worth the cast since the fight is ultra-high movement. If you insist, drop it on the nearest group of casters who’re likely to stand still for a little longer.
- You can use Travel Form to zoom around the arena. Combine it with your extra action button for a badass flying stag. Hard to top.
- You can heal the bottom platform from the middle one by standing on the ledge. A sometimes useful trick for healing both lanes at once.
- Use Ursol’s Vortex to hold back a lane. You can also Mass Entangle if your DPS are running late and typhoon knocks back most of the smaller adds too.
- Feral Affinity is high value here with Sunfire -> Cat Swipe producing amazing AoE damage.
Mythic
- If you’re assigned to heal the Paraxis group then HoT up the party on your way to the inquisitor to buy you time to DPS it. If you’re running Feral Affinity then save a 5 combo point Ferocious Bite to burst the sucker down.
- You’ll probably be assigned to the Yellow crystal which deals stacking damage to you the more you move. Keep a HoT stack on yourself and you should be able to stack it pretty high before you have to stop moving. It won’t stack or deal damage to you while you’re flying so use Surge of Life on cooldown to keep up with your group.
Imonar the Soulhunter
This is Imonar, they threw almost all of his mechanics into the bridge so if you survive that twice you should have a pretty easy fight on your hands.

Average Fight Length: 5-7 minutes (Heroic), 7-8 minutes (Mythic)
Debuffs to add to your healing frames: Canister (Dispellable), Empowered Pulse Grenade, Charged Blasts, Shrapnel Blast, Stasis Trap (Dispellable)
Recommended Legendaries: Velens, Prydaz, Aman’Thul’s Wisdom
Recommended Talents: Cenarion Ward, Cultivation / Tree of Life, Germination, Flourish
Boss Guides: Wowhead, Fatboss (video)
Sample Healing Assignments (Mythic): Coming SoonAbility Timers
Spell Name Damage Dodgeable Timing Phase Change - - 66%/33% Sleep Canister Debuff Only Partially P1. 0:10, 0:20, 0:30, ... Pulse Grenade Low
Yes P1. 0:13, 0:30, 0:47, ... Charged Blasts Medium, Line AoE Partially P2. 0:10, 0:30, 0:50, ... Shrapnel Blast Medium Yes Mines created throughout Empowered Shrapnel Blast Medium Yes P3. 0:15, 0:35, 0:55 Tips
- [Leytorrent Timing]: You can drink in phase 3, straight after a round of Shrapnel Blasts.
- [Efflorescence Placement]: Drop Efflorescence on the melee group while you’re on either platform. Don’t bother during the bridge intermission.
- Start Rejuv blanketing:
- 10-15 seconds before the boss hits 66% / 33%. Yeah there’s a bit of guess work here but you want that big healing ready for the bridge crossing.
- On anyone afflicted with Charged Blasts, Shrapnel Blast.
- You can use Displacer Beast to blink through most of the bridge mechanics but be careful with it! Don’t blink through one mechanic into another.
- Dispel Sleep Canister only after everyone nearby has moved away since the dispel itself will sleep everyone within 10 yards.
- It’s very easy to blow up the raid with Empowered Pulse Grenade and you’ll need to train your raid to isolate themselves if they get the (long) debuff.
- You can squeeze all of your team’s mobile healing cooldowns into the two bridge intermissions.
Mythic
- Coming very soon.
Kin’garoth
The legions engineer. Unfortunately there is no secret phase where he grows legs. Kin’garoth can be a chaotic fight to heal with damage often coming in spiky bursts as people get hit by various mechanics. We do shine during the intermission phase where the raid’s afflicted by heavy unavoidable damage.

Average Fight Length: 5-8 minutes (Heroic), 7-9 minutes (Mythic)
Debuffs to add to your healing frames: Decimation
Recommended Legendaries: Velens, Aman’Thul’s Wisdom, Prydaz
Recommended Talents: Cenarion Ward, Cultivation, Germination / Inner Peace, Flourish
Boss Guides: Wowhead, Fatboss (video)
Sample Healing Assignments (Mythic): Coming SoonAbility Timers
Spell Name Damage Dodgeable Timing Adds Phase - - 0:40, 2:40, 4:40, ... Diabolic Bomb Medium, raid-wide Yes Every 20s while active Ruiner Fatal Yes Every 20-30s while active Reverberating Strike Medium Yes Every 30s while active Tips
- [Leytorrent Timing]: This is a pretty bad fight for getting in a Leytorrent but it’s possible. The best time is during the end of the intermission before Kin’garoth has reactivated but after Apocalypse Blasts have stopped raining down.
- [Efflorescence Placement]: A poor fight for Efflorescence though you should still get some value from it by dropping it on the melee stack point after each Ruiner cast.
- Start Rejuv blanketing:
- As each intermission begins. These are great times to drop EoG also.
- During the lifespans of the Garothi Demolisher and Garothi Decimator adds.
- Don’t die to the Ruiner beam. That’d be really embarrassing for you. Add a countdown in DBM / Big Wigs to make sure you don’t let it creep up on you. You can blink through it if you’re looking to pick up some style points.
- We are excellent choices to soak the Annihilation circles with our high mobility and ability to regenerate all the damage with Frenzied Regeneration.
- Try and stay with the group. It’s a pretty big platform and if you end up separated you’ll lose people that’re out of range.
Mythic
- Mythic coming soon.
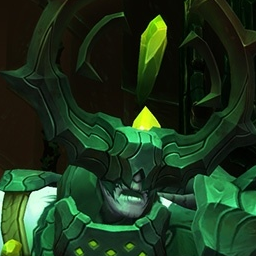
Varimathras
Varimathras is the ultimate HPS fight and a great chance to stake a new personal best. It’s also incredibly simple mechanically which means you can pour all of your focus into crafting a perfect rotation.

Average Fight Length: 3-5 minutes (Heroic), 5 minutes (Mythic)
Debuffs to add to your healing frames: Misery, Necrotic Embrace, Echos of Doom (Mythic)
Recommended Legendaries: Chameleon Song, Velens, Prydaz
Recommended Talents: Cenarion Ward, Renewal, Incarnation: Tree of Life, Spring Blossoms, Flourish
Boss Guides: Wowhead, Fatboss (video)
Sample Healing Assignments (Mythic): Coming SoonAbility Timers
Spell Name Damage Dodgeable Timing Torments Low, raid-wide No Constant Necrotic Embrace Medium, debuff No 0:35, 1:35, 2:35, ... Dark Fissure Low, AoE Yes 0:15, 1:20, 2:25, ... Tips
- [Leytorrent Timing]: You can Leytorrent whenever you like, so long as the next Necrotic Embrace / Dark Fissure timers are at least 10 seconds away.
- [Efflorescence Placement]: The raid is entirely stacked for almost the entire fight giving Efflorescence full value. You should aim for 100% uptime.
- Start Rejuv blanketing:
- During Torment of Flames and Torment of Frost.
- This fight is mostly constant ticking damage so rejuvenations will always get value but you need to first maximise the number of Wild Growths you can fit into the fight, and then use any spare mana to rejuv but you must focus on your most efficient sources of healing first. Keep Efflo down, use Wild Growth liberally, and only then think about rejuvenation.
- Necrotic Embrace does nothing for six seconds which means you can use Displacer Beast to blink out of the raid half way through the debuff. By minimizing the amount of time you spend in the dark you can ensure you only get hit by one Alone in the Darkness cast. Use Bear Form during the run back since you won’t be healable. Don’t mess this up since you’ll wipe the raid if you move out too late.
- Targets with Misery can’t be healed, so use Ironbark if there’s a tanking error or to keep a squishy Necrotic Embrace target alive.
Mythic
- Mythic coming soon.


