Siege of Boralus Mythic+ Dungeon Guide
Instance Breakdown
Instance Timer: 39 minutes
Wowhead Guide: Link
Trash
[masterslider id=”33″]Method Dungeon Tools Strings
Classic Path – Alliance: https://wago.io/siegeofboralusalliance
Classic Path – Horde: https://wago.io/siegeofboralushorde
Special Mechanic: Spotter Friendly Fire
Siege of Boralus has a special kind of mob called a Spotter. They’ll target random players with big blue circles and after a few seconds they’ll explode for moderate damage. These circles actually hit enemy mobs as well and we can use this to speed up our instance run significantly. This is explained briefly in the trash route above but here’s some extra stuff you should know:
- Any mobs you kill this way need to be tagged with a damage spell or you won’t get any credit.
- The circles won’t damage bosses, but they do hit boss adds including the Cannoneer and Deckhand on Lockwood and all Tentacles on Viq’Goth.
- The damage scales with Bolstering stacks. That’s right. You can bolster a Spotter to 10+ stacks and use the shots to insta-nuke any mob you come across.
- There’s a key to doing this right. The Spotter still melee attacks and with that many bolster stacks your tank will melt as quickly as the trash. You can counter this by keeping the mob rooted at all times. She’ll still cast her big blue circles from afar.
Bosses
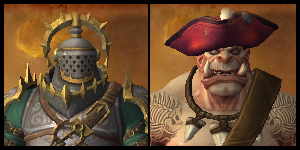
Chopper Redhook / Sergeant Bainbridge
You’ll kite the boss into bombs. This entire instance actually has a thing for making mobs die to each other instead of to you.

Dungeon Journal+
On the Hook Fixate
Meat Hook Physical Damage Dodgeable
Cannon Barrage Magic Damage Dodgeable
Heavy Slash (Irontide Cleaver) Frontal Line Physical Damage Debuff (Stun) Dodgeable
Molten Slug (Irontide Powdershot) Randomly Targeted Magic Damage Interruptable
You should know
- The boss will spend most of the fight chasing around a randomly selected ranged player (this can include the healer if they’re not a Mistweaver Monk or Holy Paladin). Your goal is to kite them into the big bombs on the ground.
- You can tell which circles are going to leave a bomb by whether they’re filled or empty.
- If you don’t kite the boss into the bombs then they’ll explode for ultra high party-wide damage. If you’ve made a few mistakes and there’s no chance of getting the boss to a bomb then you’re better off having a party member pop all defensives and throw themselves onto the bomb. God that’s heroic.
- Obvious Dodge: The big swirling Gore Crash AoE around the boss. This is a flat one shot if you’re hit and it’ll always follow a Meat Hook cast (which you’ll want to dodge).
- This is a pretty heavy add fight and they’re vulnerable to most kinds of CC so the best strategy is to organize an order and keep them out of the fight as long as possible.
- Powdershots ping random allies for heavy single target damage.
- Cleavers do a large line AoE ability that will one shot you on reasonably high keys.
- The boss will spend most of the fight chasing around a randomly selected ranged player (this can include the healer if they’re not a Mistweaver Monk or Holy Paladin). Your goal is to kite them into the big bombs on the ground.
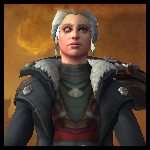
Dread Captain Lockwood
Dread Captain is a pretty badass title. I’m stealing it.

Dungeon Journal+
Shoot Single Target Physical Damage
Gut Shot Randomly Targeted Physical Damage Debuff (Moderate DoT) Only cast when no tank in range
Clear the Deck Frontal Cleave Physical Damage Dodgeable
Dread Volley Magic Damage Dodgeable Fatal
Crimson Swipe (Ashvane Deckhand) Frontal Cleave Physical Damage
You should know
- Every time Lockwood reaches 100 energy she’ll return to her ship and you’ll be flanked by three adds: a Cannoneer and two Deckhands. Your DPS should 100% be focusing on dropping the cannoneer first. Don’t even stop to multi-DoT the deckhands. As soon as he’s dead you can pick up the cannon and use it to bring the boss back to the fight. Not only does this shorten the phase (and the entire fight) but it also reduces the chance that anyone dies to the numerous Dread Volley swirls.
- It takes the boss ~35 seconds to reach 100 energy but she’ll cheat and start around 75%. Aim to kill it in as few phases as possible because the intermissions really chew up your instance timer.
- The boss has a nasty frontal cleave called Clear the Deck. It has a three second cast time and the tank can dodge it too. Don’t stand in front of the boss.
- Cheese: If you CC the Deckhands before they leave the ship they’ll bug out and you won’t have to deal with them again for the rest of the fight.
- Every time Lockwood reaches 100 energy she’ll return to her ship and you’ll be flanked by three adds: a Cannoneer and two Deckhands. Your DPS should 100% be focusing on dropping the cannoneer first. Don’t even stop to multi-DoT the deckhands. As soon as he’s dead you can pick up the cannon and use it to bring the boss back to the fight. Not only does this shorten the phase (and the entire fight) but it also reduces the chance that anyone dies to the numerous Dread Volley swirls.
Hadal Darkfathom
The boss with three total mechanics. A taste of WoW Classic.

Dungeon Journal+
Crashing Tide Frontal Line Magic Damage Dodgeable
Break Water (Cast every ~30 seconds) AoE Magic Damage Partially Dodgeable Avoidance
Tidal Surge (Cast every 50 seconds) AoE Magic Damage Dodgeable Fatal
You should know
- This is a straightforward fight strategically but he has a huge health pool so optimizing DPS is key.
- Tank: Face the boss away from the party. During the Crashing Tide cast sidestep and stand to the left or right of the frost path. Continue to do this until the Tidal Surge cast (the huge wave).
- DPS and Healer: Avoid the blue swirlies. These will also leave frost patches that match the Crashing Tide path. Your positioning doesn’t matter too much but avoid sitting next to the statue in the middle since you’ll need this to avoid the Tidal Surge and you don’t want to be wading through frost puddles when you do so.
- During the big wave: Hug the pillar on the side opposite the wave. It’s a one shot if you get hit so prioritize this over everything (even refreshing DoTs).
Viq’Goth
Like a fancy modern day Lurker.

Dungeon Journal+
Putrid Waters (Two every 20 seconds) Magic Damage Debuff (Magic, Moderate DoT)
Call of the Deep Magic Damage Dodgeable Fatal
Slam (Demolishing Terror) Physical Damage Dodgeable
Hull Cracker (Demolishing Terror) AoE Physical Damage Only cast when no tank in range
You should know
- Kill Demolishing Terrors first. If you’re slow then you’ll end up with multiple and that’s really bad news for you because they’ll deal heavy AoE damage if nobody is in melee range. Multi-DoT Gripping Terrors and swap to them in between Demolishers. When they die the engineer inside will repair the cannon and you’ll use that to kill the boss (over three shots / platforms).
- Take care when walking across the bridges between platforms. When the debuff expires or is dispelled it’ll knock back everyone nearby. It shouldn’t be a problem but just be aware of it (and as a healer don’t dispel it until you’re safe on the platform).
- Obvious Dodge: The big blue swirls. When you make it to the ship you can stand on the upper decks to avoid them entirely.
- Healer: Dread Captain Voulk recommends dispelling the longest remaining Putrid Waters cast whenever your dispel comes off cooldown. It’s much more efficient to remove that damage from the fight instead of trying to heal through it. You’ll have multiple out at a time frequently so dispel on cooldown and keep the other alive. That and the tank are the only targets that should need healing.
Check out Shrine of the Storm | Back to the Compendium | Check out Temple of Sethraliss


