The Underrot Mythic+ Dungeon Guide
Instance Breakdown
Instance Timer: 33 minutes
Wowhead Link: Link
Trash
[masterslider id=”24″]Method Dungeon Tools Strings
Classic Path (pictured above): https://wago.io/underrot
Bosses
Elder Leaxa
Cults man. God damn cults.

Dungeon Journal+
Blood Bolt Magic Damage Interruptible
Creeping Rot Magic Damage Dodgeable
Sanguine Feast Magic Damage Dodgeable Fatal
You should know
- This is an easy fight if you have strong group DPS and the ability to step back from the boss during Sanguine Feast.
- Creeping Rot is fired in a random players direction. You have plenty of time to dodge it but if you don’t it’ll one shot you.
- When a Blood Effigy spawns focus it down first, unless the boss is sub ~20% health.
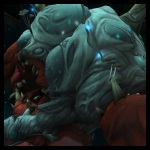
Cragmaw the Infested
Gross, and yet one of my favorite mounts.
Dungeon Journal+
Indigestion Magic Damage (Frontal Cone)
Charge Physical Damage Dodgeable
Tantrum (Cast every 45s) Physical Damage Avoidance
You should know
- Tank Cragmaw toward the side of the room. Have your DPS and healer stand to the left and right of him with their backs against the wall. When he Charges at one of them you want to minimize the distance he travels. This increases DPS time and reduces the number of Larvae you have to crush.
- Tank: Indigestion will always fire in your direction but is 100% dodgeable. Once he starts the cast simply sidestep then return to where you were standing.
- During Tantrum your entire party will need to spread out and squash Larvae. Assign each of your party members to a quadrant. Your healer might struggle to get many depending on class since this is an ultra high damage phase. Pop your defensive cooldowns here. You won’t take damage anywhere else in the fight if you play it properly.
Sporecaller Zancha
This is where your healer finds out how well the group can do mechanics.
Dungeon Journal+
Decaying Spores Magic Damage Debuff (DoT, Stacks)
Festering Harvest Magic Damage Avoidance
Shockwave Physical Damage (Frontal Cone) Dodgeable
Upheaval Physical Damage Dodgeable
You should know
- This instance is actually quite interesting in that most of the bosses are quite easy if you do the mechanics properly and unforgivably difficult if you don’t.
- For this fight the keys are to clear as many mushrooms as possible with the bosses mechanics. You don’t need any tricky cloak clears or immunities. You just need to use the tools given to you to their maximum potential.
- Upheaval: Targets two players at once. Will clear any mushrooms it hits. You’ll want to run from it so it doesn’t actually hit you since it does very heavy damage.
- Shockwave: Targeted at the tank only. Stand such that there’s a giant pile of mushrooms behind you. Side step it as the cast completes.
- Healer: You’re playing catch up here. You’re going to save your group from any mistakes. Heal anyone that stands in a shroom and save your big healing cooldowns for if any are missed when Festering Harvest is cast.
- It’s better to run into any remaining mushrooms during the Harvest cast instead of letting the boss blow them up.
Unbound Abomination
Kind of like Argus but with blood and fungus.
Dungeon Journal+
Putrid Blood Magic Damage Debuff (Magic, DoT, Stacks)
Vile Expulsion Magic Damage (Cone)
You should know
- Alright, pretend the Vile Expulsion is a big Sweeping Scythe. You’re going to stay reasonably grouped and then when the cast starts you’ll rotate to the left or right. This is honestly the only ultra dangerous mechanic in the fight.
- The boss doesn’t actually take damage from your attacks. Instead they cause him to drop little blood adds. Killing those will damage the boss and killing six will end the fight. Fortunately Titan Keeper Hezrel followed us all the way here without doing anything and finally joins in. He’ll occasionally smite one for you and because of this you can keep most of your focus on the boss himself.
- The Spores will slowly travel toward you. If they hit you they’ll straight up kill you. Hit any that get close. They have no health.
- Healer: Unbound Abomination is full of slow heavy ticking damage. The group will clear all stacks of the debuff whenever Cleansing Light drops (the big yellow circle) but I’d recommend individually dispelling at 2 stacks to help control the incoming damage. It’s a more efficient global cooldown than a heal.


Check out Motherlode | Back to the Compendium | Check out Tol Dagor