Black Rook Hold Mythic+ Guide
Instance Breakdown
Recommended Comp for high keys: Black Rook Hold demands strong AoE CC for the Grand Hall. The instance is mostly Undead and a sap effect can make the larger packs significantly easier to deal with.
Instance Timer: 39:00
Average # Mobs per pack: 3.7
Trash
[masterslider id=”14″]Trash ERT Note
Copy and paste this into the Exorsus Raid Tools Notes section. You can share it with your group.
|cffffff00Black Rook Hold Trash Path|r
Invis pot through to the first boss.
{skull}|cff8788eeAmalgam of Souls|r{skull}
Pull spiderlings in 1-2 packs.
Pull Rook Spinner
Pull Champion / Scout Patrol
Pull through the Great Hall. CC if necessary.
{cross}Commander Shemdah’sohn{cross}
Pull the archer / champion pack
{skull}|cff8788eeIllysanna|r{skull}
Don’t die to boulders pt1
Pull through Wyrmtongue Hall.
Grab Hound / Scavenger from side room.
Don’t die to boulders pt2
Skip Wyrmtongue at top of stairs
Pull through Bat Stairs
{skull}|cff8788eeSmashspite|r{skull}
Pull through Lancer / Swordsman packs
{skull}|cff8788eeLord Ravencrest|r{skull}
|cffffff00Questionablyepic.com/mythic-plus|r
Bosses
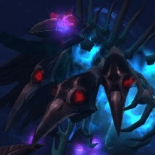
Amalgam of Souls
Night elf souls merged together = weird birdlike thing

Dungeon Journal+
Swirling Scythe Ground Physical ✔Dodgeable
Soul Echos Ground Shadow ✔Dodgeable
Reap Soul AoE Shadow ✔Dodgeable
Soul Burst AoE Shadow ✔Avoidance ✔Dodgeable
You should know
- Tip:
 Soul Burst is only cast when all the Restless Soul are dead or the boss reaches 15%, whichever occurs first. If you have a Druid, they can Entangling Roots to prevent one of the Restless Soul from moving, buying you more time to DPS while the boss sits .
 - Save all of your defensives for the Soul Burst attack. You’re looking at 6-7m raw damage for a 20 key.
- The tank should pull the boss out of the centre of the room and toward one side. This gives the group more room to dodge Scythe / Soul Echos.
Tanking Tips
- Coming Soon!
Healing Tips
- A good group will leave you with literally nothing to heal here since the tank damage is low and 100% of the damage is avoidable except for Soul Burst which only hits once. This is a great opportunity to pull on your DPS gear and impress your team.
- If you’re running with a few squishier DPS consider Ishkar’s Felshield Emitter to keep them alive through a Soul Burst one shot. Make sure you use externals like Pain Suppression / Ironbark here too.
- Tip:
Illysanna Ravencrest
Trivia: The first female Demon Hunter
Dungeon Journal+
Brutal Glaive Single Target Physical Debuff (DoT)
Dark Rush Multi Target Physical
Blazing Trail (results from Dark Rush) Ground Fire ✔Dodgeable
Vengeful Shear Single Target Physical
Eye Beams / Felblazed Ground Ground Fire ✔Dodgeable
Bonecrushing Strike (Soul-torn Vanguard) AoE Physical ✔Dodgeable
Arcane Blitz (Risen Arcanist) Single Target Arcane ✔Interruptable
You should know
- Glaive Toss is targeted on a ranged DPS or healer and hits everyone in a 10 yard radius from that player. Spread out. It can be removed with Blessing of Protection and some immunities.
- The eye beam does its damage through the Felblazed Ground it leaves underneath it. Kite it in a circle so that you don’t use up too much of the small-ish arena.
- The Soul-torn vanguard isn’t very dangerous (though he casts a cone stun that you should avoid) but the Arcanist will pelt random party members for increasing damage and should be interrupted and then killed. On high keys you may still want to kill off the vanguard on behalf of your melee but it is a time saver to just cleave him down.
- Blazing Trail really sucks, but can be roughly controlled. It’ll dart between three players leaving fire along the path. You want to minimize the distance travelled, and then move quickly enough that you take a maximum of one tick of the fire. Anyone still carrying a Glaive Toss DoT will need heavy healing.
Tanking Tips
- Coming Soon!
Healing Tips
- Blazing Trail is almost impossible to heal through so you’ll need your team to be on top of avoiding it.
- Brutal Glaive hits like… you’d expect a Brutal Glaive to hit I guess. Make sure the debuff is displayed prominently on your healing frames and aim to keep them topped off. The debuff frequently overlaps with Dark Rush and if you keep them at full health they should be able to survive a tick of it.
Smashsmite the Hateful
Why do all Mo’args have eye patches? What happens on their planet that is so dangerous to left eyes
Dungeon Journal+
Brutal Haymaker Single Target Physical
Earthshaking Stomp AoE Physical ✔Avoidance
Hateful Gaze Single Target Physical
Fel Vomit Ground Fire ✔Dodgeable
You should know
- Stack your party to one side of the platform to keep the Fel Vomitus (lovely name) grouped together. Stack up and move together from one side to the other. You’re doing this to make sure you don’t run out of space, and so you aren’t knocked into it during Earthshaking Stomp.
- Hateful Gaze will target a random ranged DPS but can be intercepted by anyone in the party by standing directly in Smashspites path. To make sure you’ve got it lined up correctly it’s best to stand directly on the directional arrow below his character. Hateful Gaze is physical damage and you’ll want to chuck anyone with high armor or strong defensive cooldowns in the way. After you’ve taken one you’ll be stamped with a debuff to discourage taking the next couple so you’ll need a rotation.
- Hateful Gaze can also be Dodged and Parried. Rogues with Evasion will take no damage and a Feral Druid with Protection of Ashamane will be able to take every Earthshaking Stomp by shifting out of Cat Form for every one.
- Earthshaking Stomp always follows Hateful Gaze and the healer should endeavor to make sure whoever took the blow is topped up.
Tanking Tips
- Coming Soon!
Healing Tips
- Top the party up before Earthshaking Stomp since on higher keys it can easily deal 90% of your HP bar or more.
- Watch the bosses energy bar. When it hits 100 he’ll cast Brutal Haymaker and try to turn your tank into cheese. Use your cooldowns and keep them at full health.
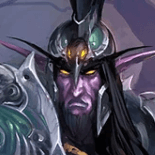
Lord Ravencrest
Illysanna’s Daddy
Dungeon Journal+
Ravencrest Phase
Unerring Shear Single Target Physical
Whirling Blade AoE Physical ✔Dodgeable
Shadow Bolt Single Target Shadow
Dark Blast Ground Shadow ✔Dodgeable
Dantalionax Phase
Shadowbolt Volley AoE Shadow ✔Avoidance
Dark Obliteration Ground Shadow ✔Dodgeable
Cloud of Hypnosis Ground Debuff (Magic)
Stinging Swarm Single Target Physical
You should know
Phase 1 (Ravencrest Phase)
- Unerring Shear is on a timer and absolutely craps on the tank. They’ll need to be topped up before and after it hits. It also leaves a pretty annoying DoT so you’ll want to blow through this phase as quickly as you can. The DoT can be removed with Blessing of Protection or Divine Shield if available during the phase transition.
- Whirling Blade will target a player and then spin slowly toward them, chunking anyone in its path. They’re unlikely to one shot you but you’ll need to dodge them all the same.
- Latosius (seriously, the names in this place) will pelt your party with Shadow Bolts from above, occasionally stopping to throw out a Dark Blast as a preview for the next phase. You can mostly ignore him.
Phase 2 (Dantalionax Phase)
- You’re going to get a huge buff to your health, damage and healing to get you through this phase but unfortunately it’s running late and so you have to take the first Shadowbolt Volley without it. This occurs about 10 seconds into the phase and is highly likely to one shot anyone without an active defensive up. Your healer needs to have the party at 100% life before it hits; don’t lose anyone to this. Anyone who dies to this cannot be battle ressed (since they won’t get the buff). You CAN battle res anyone who survives this and dies to a later mechanic.
- DoTs continue to tick while he’s away chucking beams. He’s away for about 23 seconds so you’ll want to refresh them.
- The first Swarm will go out shortly after the Shadowbolt Volley and this person will need immediate healing. Run the Swarms into melee so that the boss is getting cleaved as you kill them. Particular priority goes to swarms that go out just before the Dark Obliteration comes down since trying to dodge the big beam while covered in bees is like running in heels.
- Healers, you can dispel anyone that stands in a Cloud but be sure to use a disapproving tone.
- Since 7.2.5 the beam will now travel in a random direction but won’t change directions once it’s started moving. The initial line is targeted at a random player, but stacking is unnecessary. Dying to the beam is #6 on the “Dumb ways to Die” scoreboard.
Tanking Tips
- Coming Soon!
Healing Tips
- The tank gets shanked in phase 1 – especially near the end with a few Unerring Shear stacks. Unerring Shear is on a timer so watch it carefully (LittleWigs is great as always) and make sure your tank has a full health bar when it hits.
- There’s no non-tank damage for 5-6 seconds before the all-important first Shadowbolt Volley. Use that time to make sure your group is topped and that your personal cooldowns are ready to go.
- Swarm targets will get crushed and they should use any defensives available. Prep for it and make sure you’re using your maximum single target throughput rotation. Avoid standing near clouds to avoid unnecessary movement.